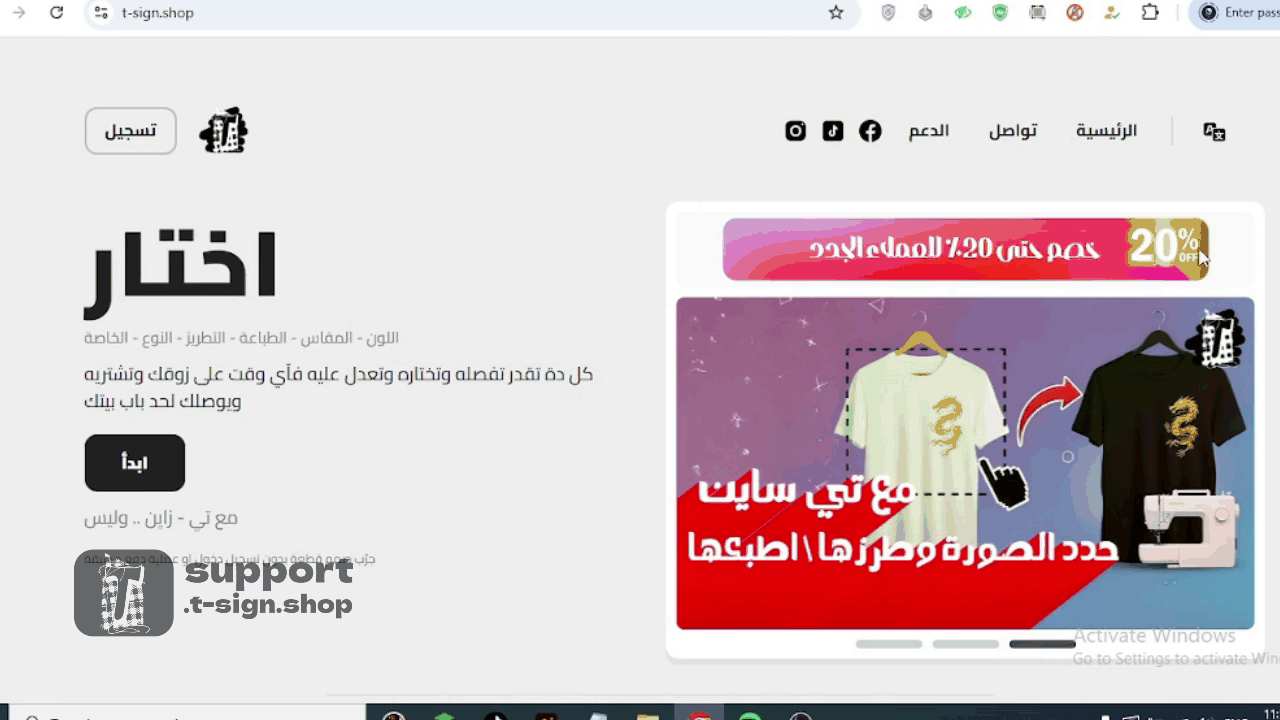
"How to enter the design area"
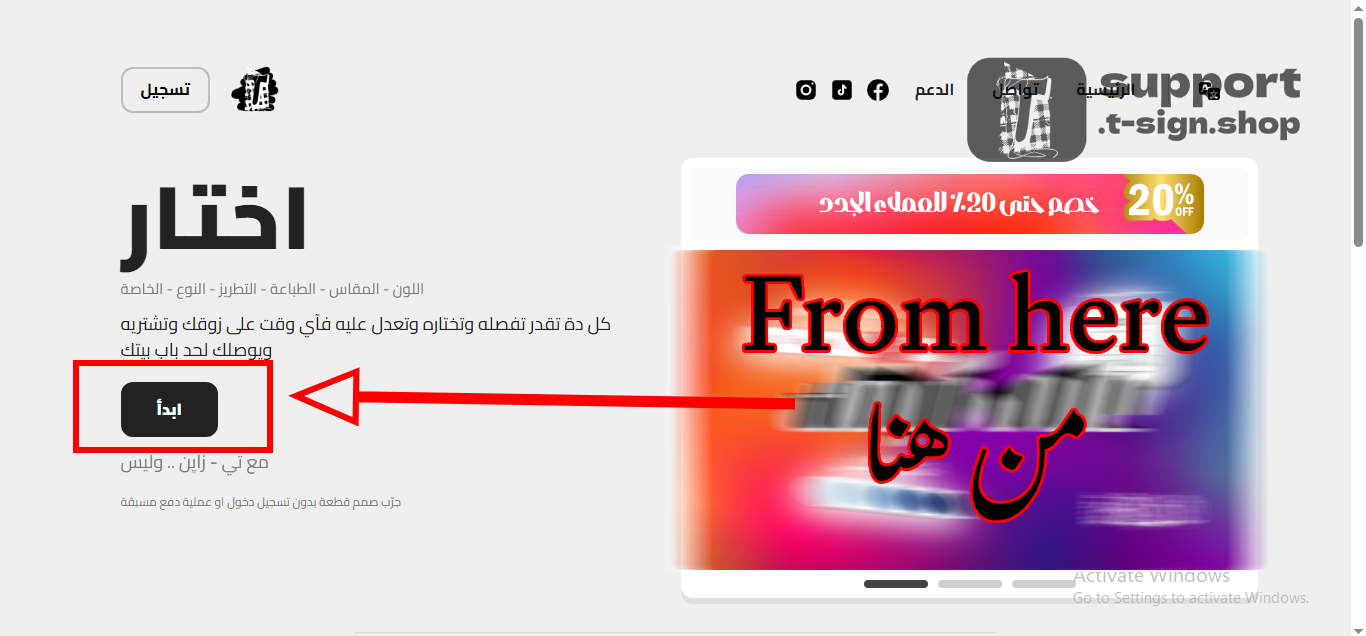
You can start your first design without needing to log in or subscribe before purchase and without payment. Click the Start button on the homepage to open the design studio and begin immediately.
"Choosing the product type"
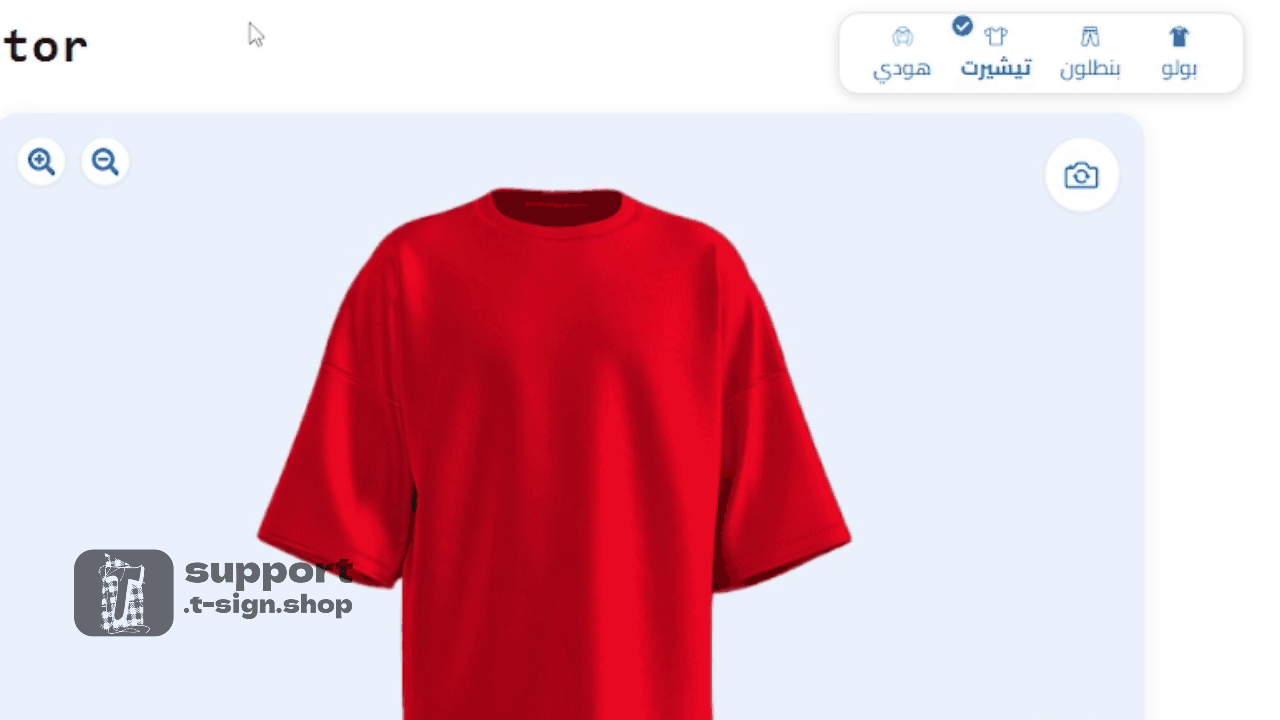
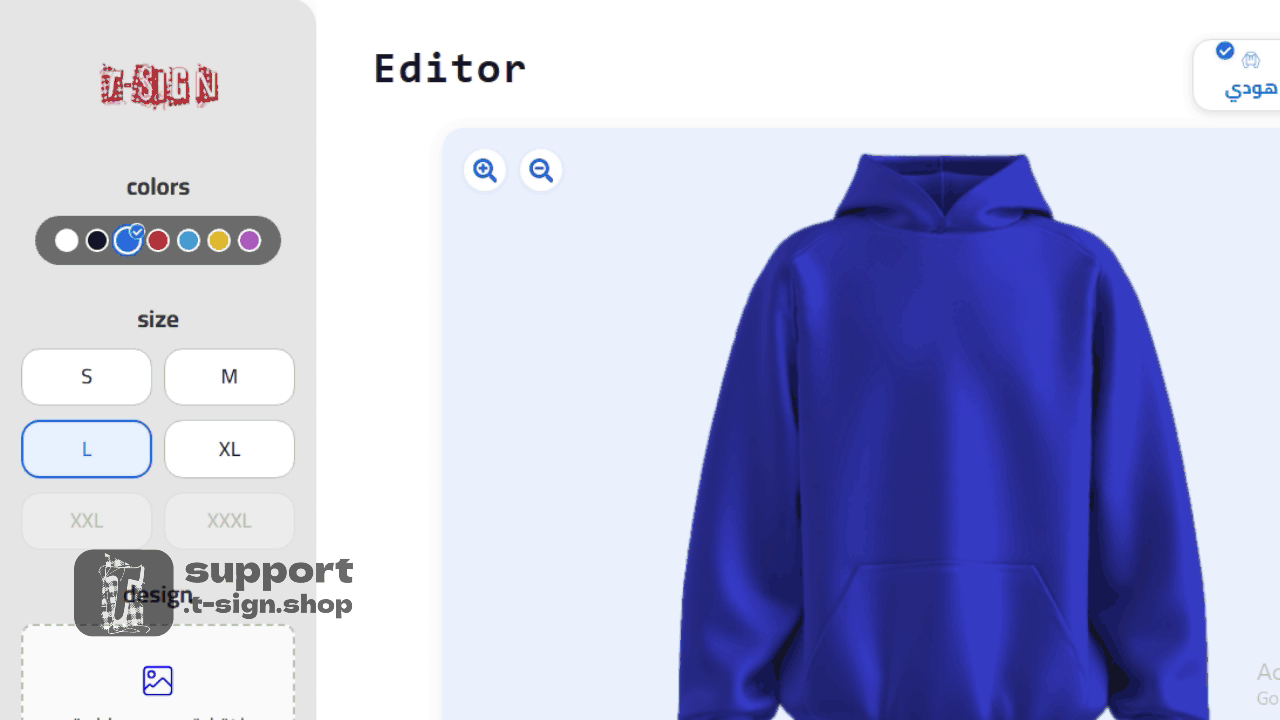
You can design on the following product options: Hoodie, T-shirt, Polo, Pants. Choose the product type from the top of the design canvas to apply your design.
"Choosing the color"
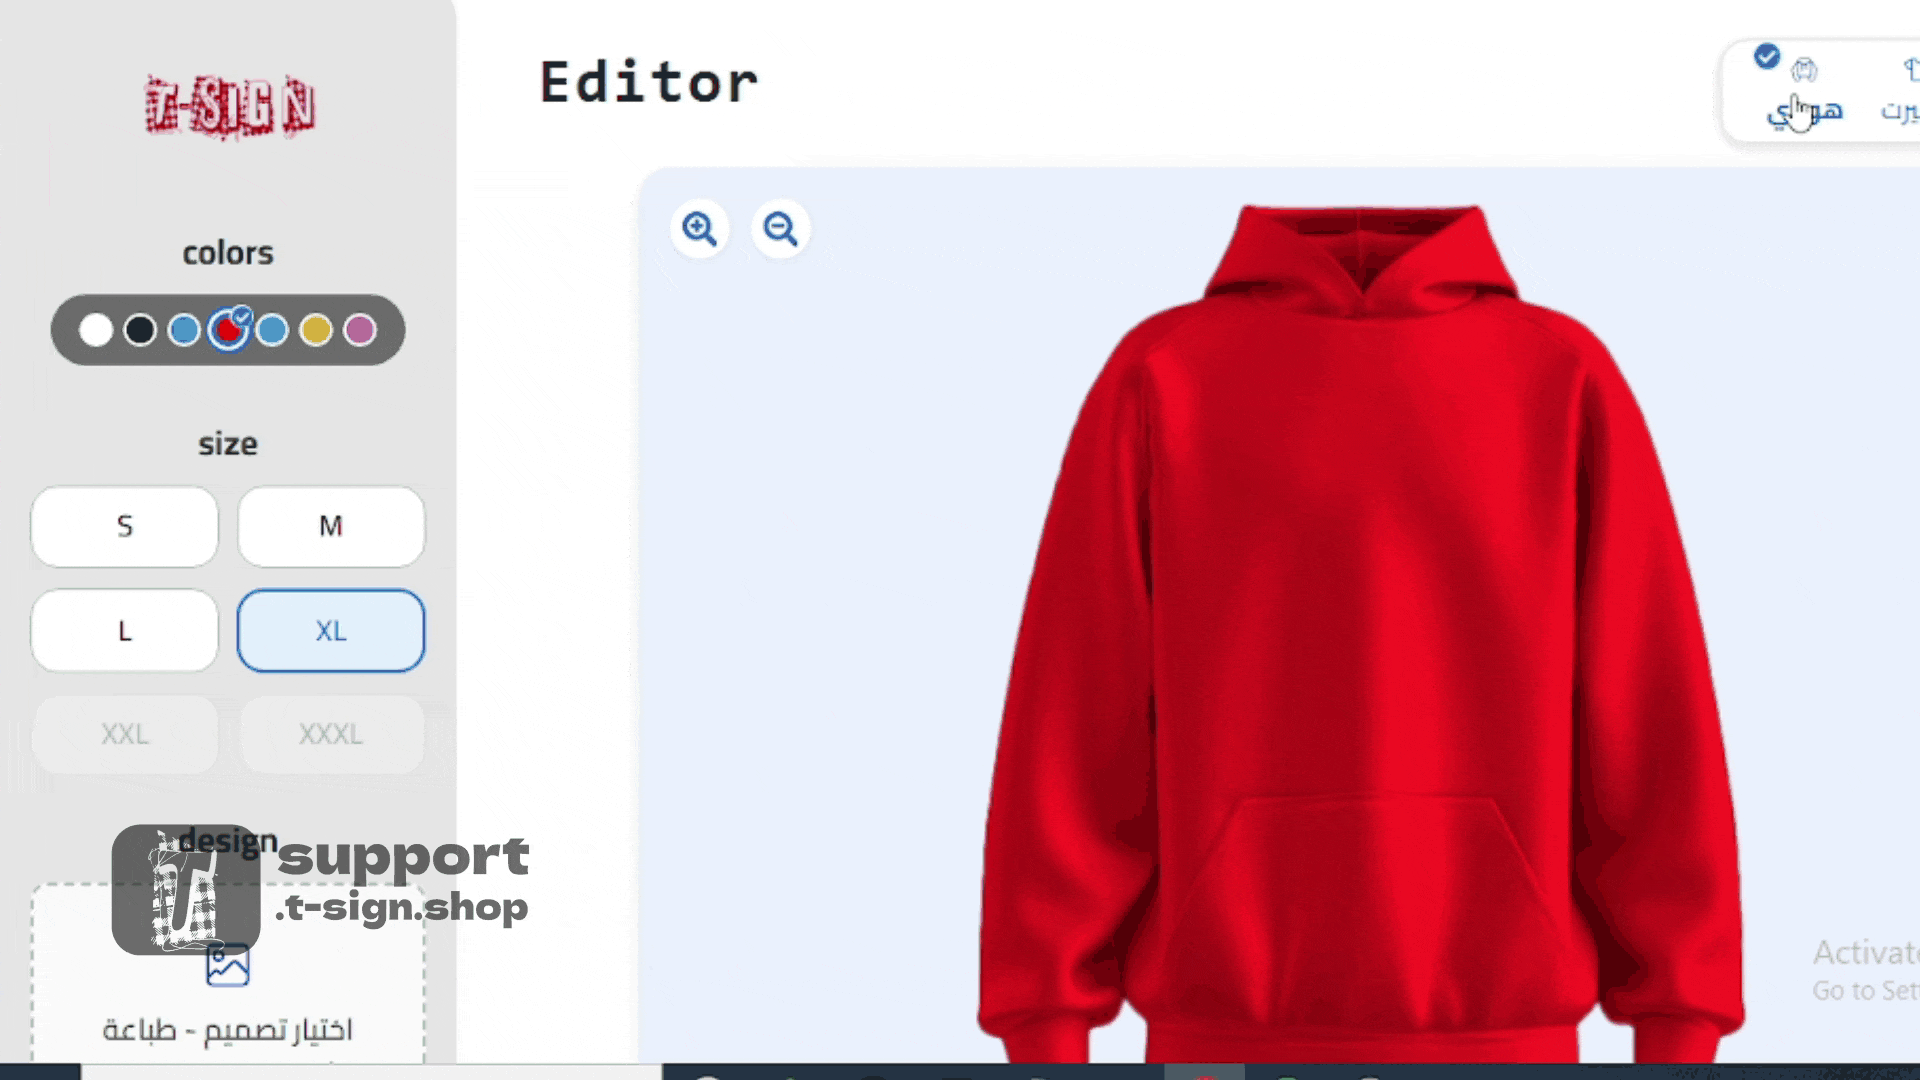
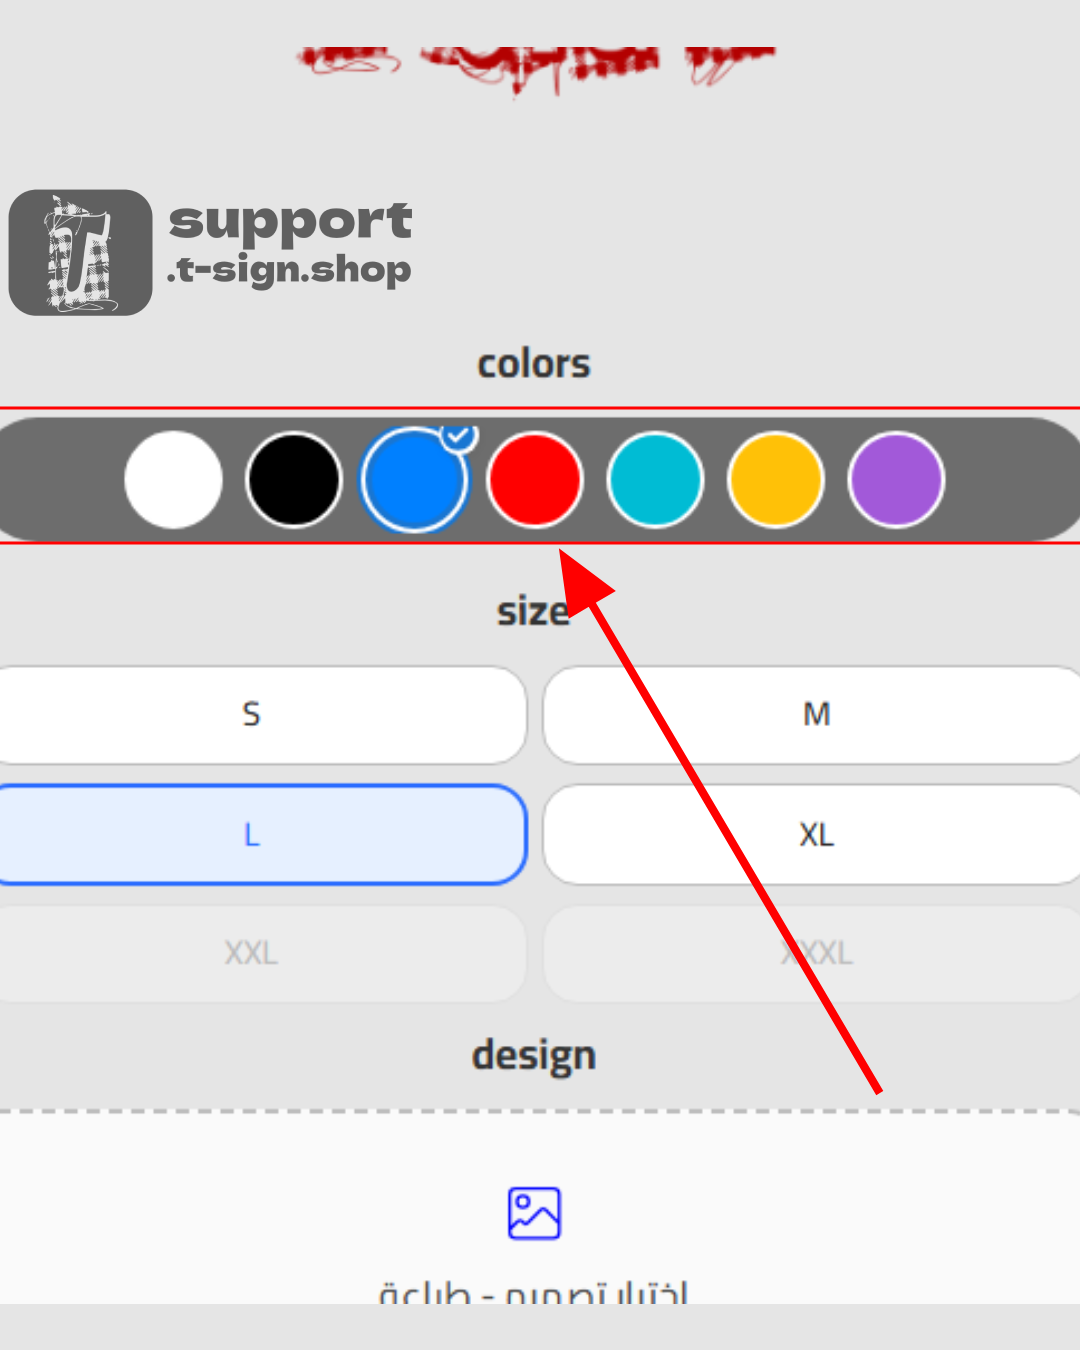
You can choose from 7 basic colors: Red, Mustard, White, Black, Purple, Blue, Green. On desktop the color tool is on the left side of the site; on mobile it appears at the top of the page.
"Choosing the size"
Below the color panel you will find the size field. We offer 6 different sizes — choose the one that fits you from the chart.
"Placing a design"
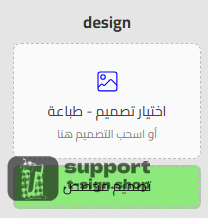
You can upload your own design from your device (PNG, JPG, SVG) or use the elements available in our library with various Arabic and foreign typefaces. After uploading you can edit and adjust the design inside the canvas.
You can also request a custom design from our designers to be executed, printed, and delivered as a final product via the Request Custom Design button.
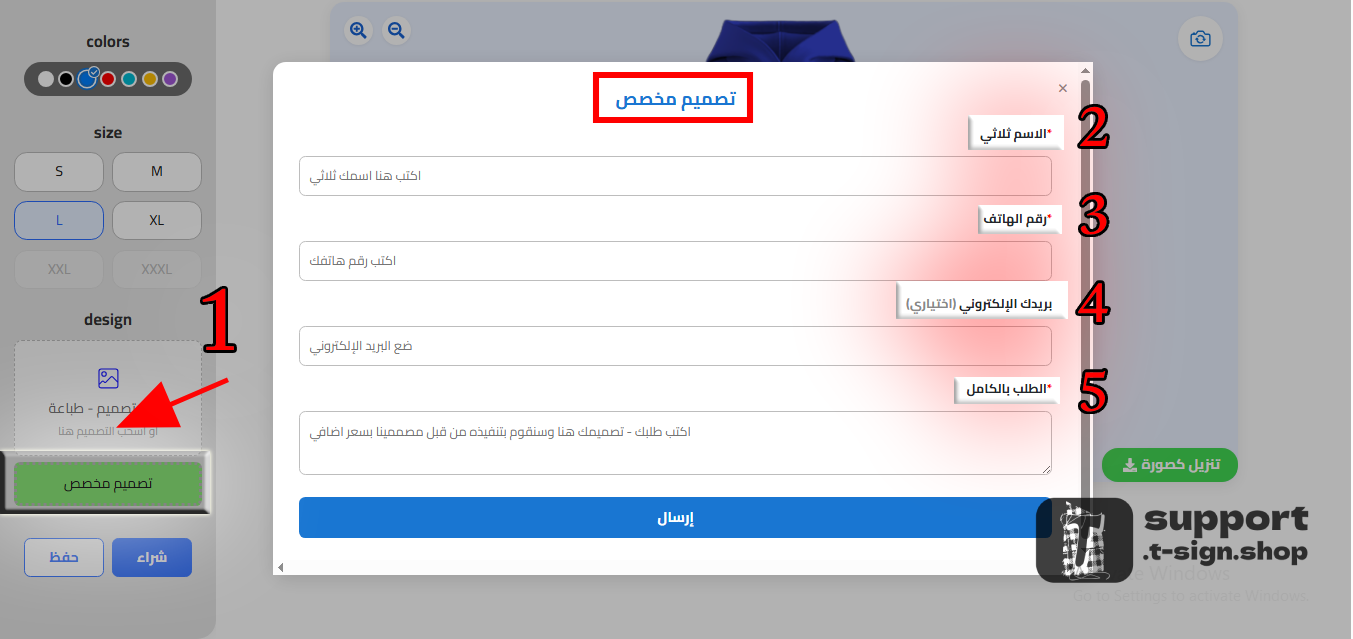
You must fill in all required fields in the form (design name, desired colors, fabric type, sizes) to enable our team to provide full assistance and execute your order accurately.
"Design canvas explanation"
You can resize your design by dragging the four-arrow handle at the lower-right corner. You can also rotate and change the angle or flip the design using the circular handle at the top-left corner.
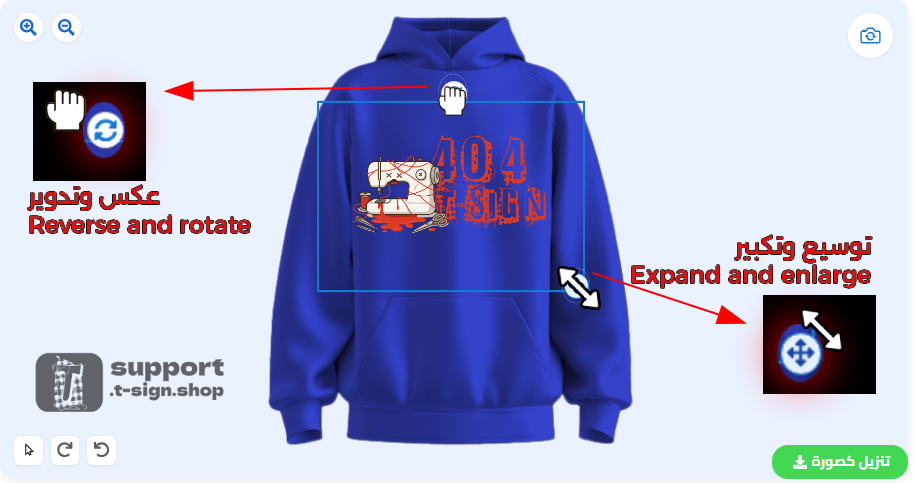
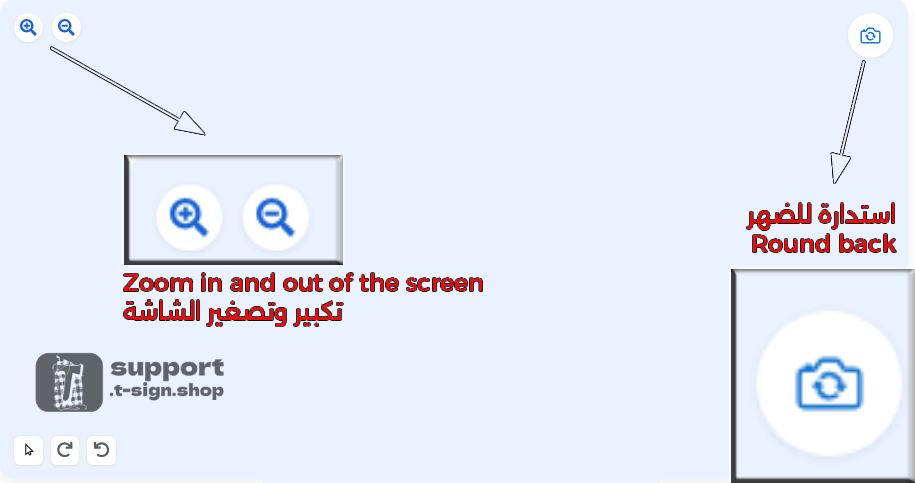
You can zoom the entire design area using the buttons at the top-left of the canvas. At the far right there is a camera button that flips the view from front to back of the clothing.
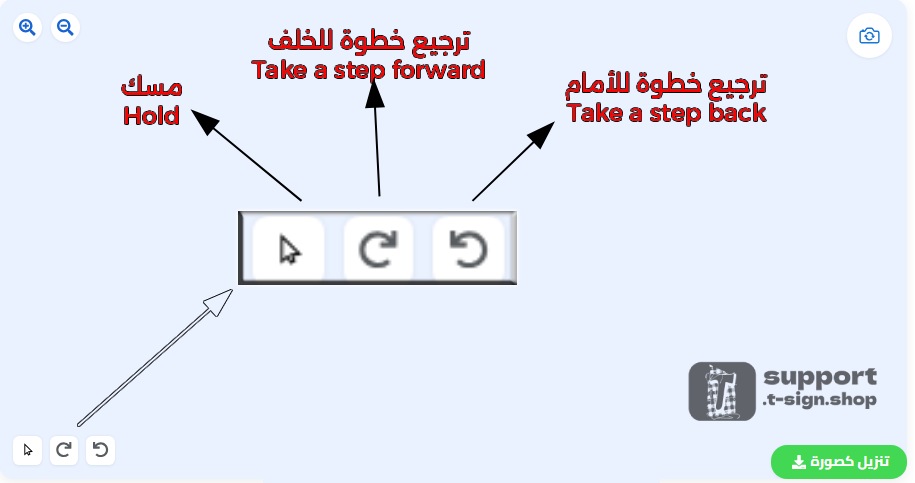
The three buttons at the bottom-left of the canvas: the first is for selecting the design (Select), the second and third are for undo and redo (Undo / Redo).
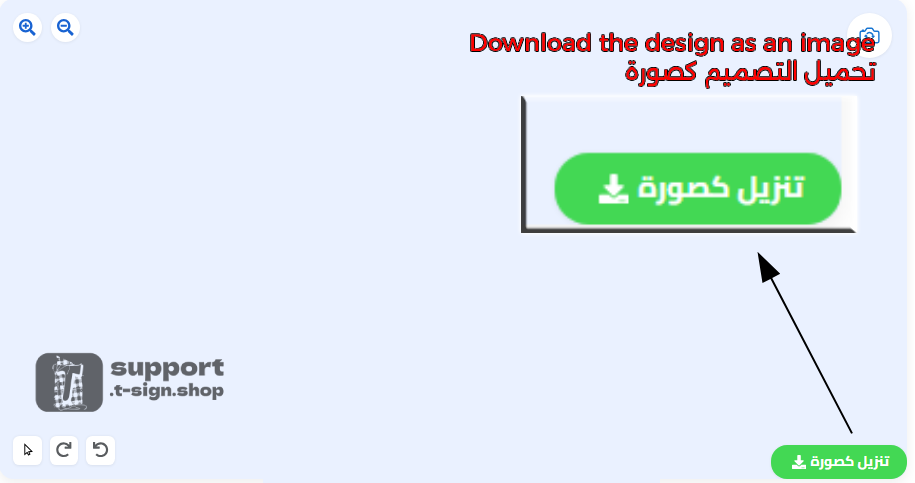
Finally you can buy the design, save it to your account, or download it as an image using the download button.
"Purchase and Save"
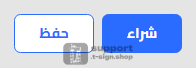
You can save the final design on the site by clicking the Save button shown in the studio. Next to it is the Buy button that takes you to the cart page where you fill in your details (Name - Address - Phone - Email) and choose printing or embroidery, then complete payment.
"How to contact"
You can contact us via the Contact page by clicking it and writing your message in the message box. You will find our email address below the message box. Before sending, please check the FAQ section — you may find a quick answer to your question.

You can also use the social media icons in the footer for quick access to our accounts.
"Changing the site language"
You can browse the site in Arabic and English by clicking the language icon at the top of the page in the fixed header. This option is available on all pages for easy and fast navigation.
